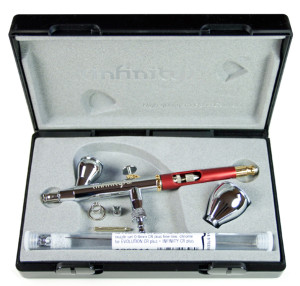
 THIS is the advice we give when asked how to clean the Harder & Steenbeck range of airbrushes.
There are two times when you should clean an airbrush. Obviously when the job is finished is one time, but just as importantly it must be cleaned between colour usage.
How you choose to clean between colours is very much a matter of personal choice; at minimum we would advise that water or solvent appropriate to the paint being used be swilled in the paint cup/bottle before being removed. The paint cup/bottle should then be filled with fresh water or solvent and the airbrush operated until the flow runs clean.
After the flow has run clear, you might as well continue spraying until your brush runs dry.
Cleaning at the end of a painting session has a few more steps involved.
Some would suggest that an end of session rinse, similar to that advised above is suitable for an end of session clean; however when considering how easy modern airbrushes can be stripped, we would advise something a bit more thorough to help protect your precision-made investment.
The following is best done immediately after you finish painting, as the paint will still be wet and easily cleaned and removed.
* Swill and rinse as described above
* Remove the paint cup/bottle and rinse and dry
* Unscrew the rear of the brush and remove it
* Loosen the needle chuck nut and draw the needle back about 2cm
* Unscrew and remove the air cap and remove the needle cap from the air cap
* Temporarily soak the air cap, needle cap and nozzle in water or suitable solvent
* Push the needle forwards and remove it from the airbrush
* Wipe the needle in a cloth or wipe, dampened with water or solvent
* Rinse the body in water/solvent, pouring it through the paint inlet and letting it flow out from the front end of the brush
* Insert the needle back into the body from the front end and pull back until the needle tip cannot be seen in the nozzle recess at the front of the airbrush body
* Remove the soaking nozzle and caps, inspect for cleanliness and agitate any remaining dirt and rinse if required
* Refit the nozzle, air cap and nozzle cap
* Gently slide the needle forwards until resistance is felt when the needle meets the nozzle and tighten the needle chuck nut. Do not force or push the needle into the nozzle, as the nozzle will be damaged
* Refit the paint cup/bottle and the body rear end
* Reconnect the airbrush to your compressor and blow any remaining water/solvent out of the brush
 Although this procedure may seem long winded, it will only take a minute or so to do when you become familiar with your airbrush.
Some cautionary notes however; always handle the needle and nozzle with great care as they are easily damaged. If you are using solvents or chemicals, use sensible precautions when handling them and be aware that if you are spraying them, adequate ventilation or respiratory protection should be used.
Always dispose of solvents and chemicals in a safe and environmentally responsible manner, and remember that the solvents and chemicals you are using may be flammable.
Comments are closed.